As mentioned yesterday, I also noticed that the dripping blood stencil could double as great seaweed and make a fab underwater scene, in fact I love the underwater scene created with this stencil 🙂
I could cut a proper seaweed/sea bed stencil (which I may still do), but its always great to have a stencil that can be used for more than one purpose (and you certainly couldn’t use a proper sea bed one as dripping blood!) I wonder if this stencil could be used for any other scenes or things too?
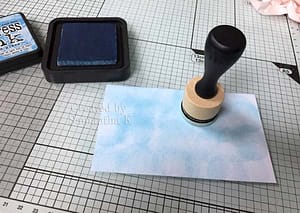
These backgrounds were only done very quickly and not on the best card for distress inks, as i just used what was in reaching distance to give the stencils a try.
I used Tumbled Glass distress ink, along with a round blender tool and fully covered the piece of card as the water. You don’t need a smooth blend for this, as it creates more depth when its uneven.
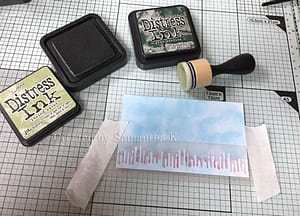
I then laid the stencil on the bottom of the piece of card, securing it with a little bit of low tack masking tape.
Again using a blender tool or piece of blending foam, sweep the blender tool off the mask onto the card. Do this all the way along.
In this picture i used peeled paint distress ink.
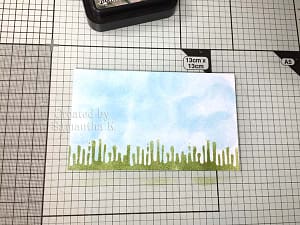
Remove your stencil and voila, a fab little underwater scene.
I need to create a cute little mermaid to add to the scene or perhaps a treasure chest! Pop it all onto a card blank with a nice sentiment and I’ll have a great little card.
I hope you’ve enjoyed seeing how I created my underwater sea scene.
Please feel free to sign up for the newsletter using the box in the side bar or by entering your email address below, that way you won’t miss out on any new shares 🙂